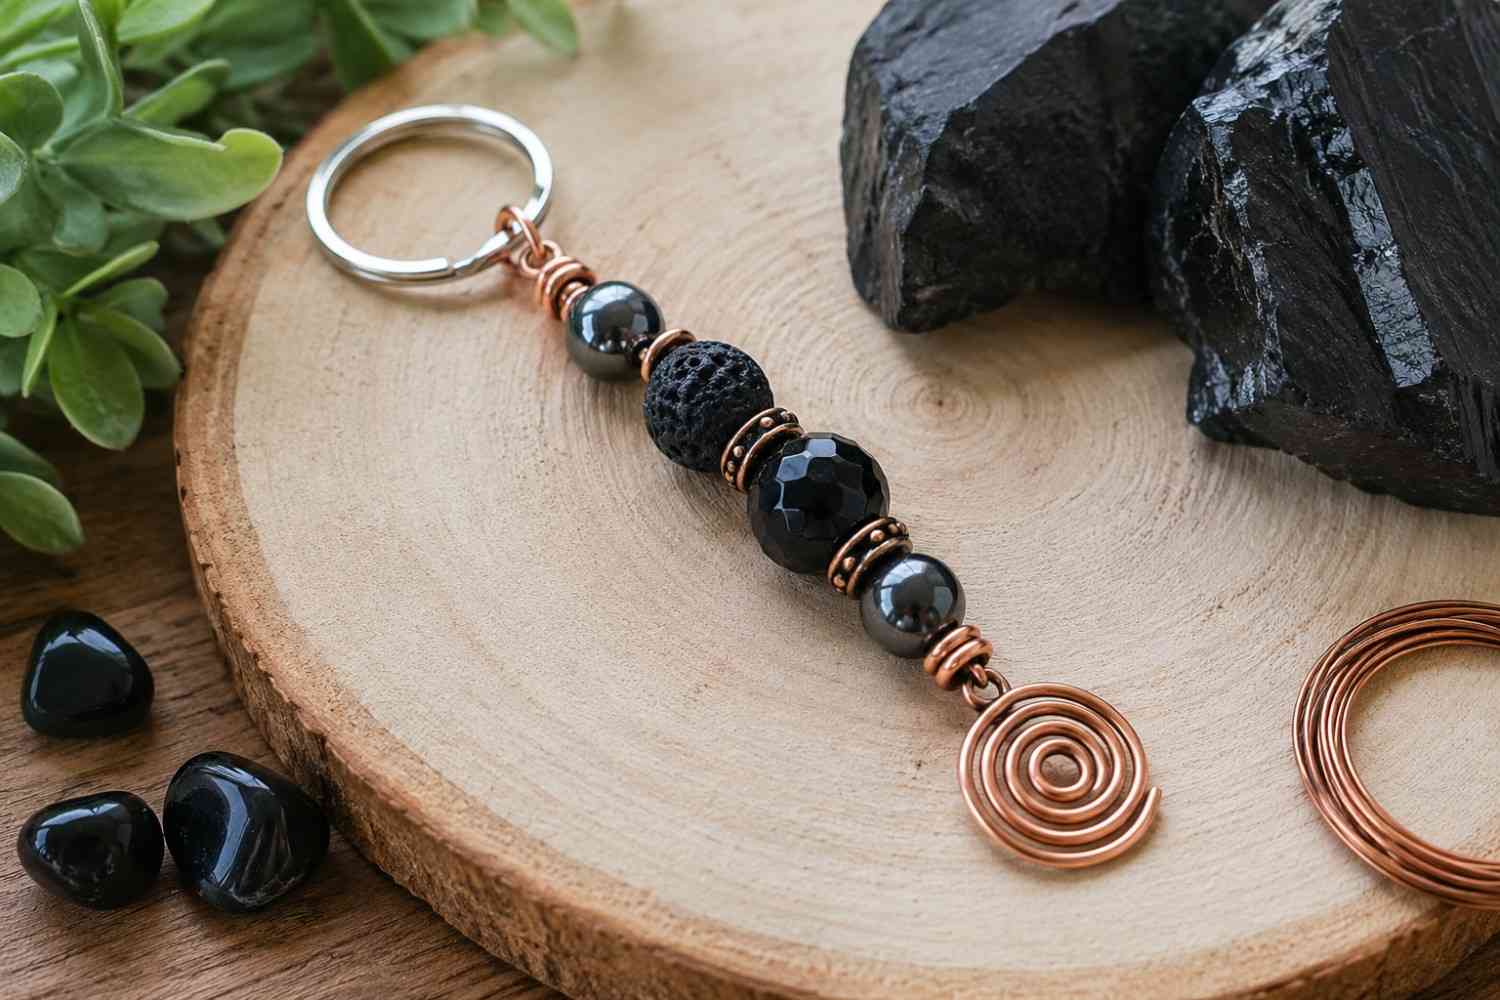
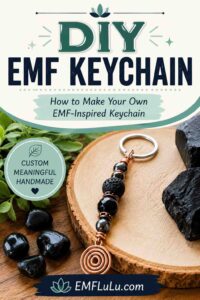
Many people enjoy creating handmade accessories because they are inexpensive, customizable, and rewarding to make. A homemade project also gives you the freedom to choose colors, materials, and styles that match your personality while creating something you can use every day. One project that has become increasingly popular among craft enthusiasts is the DIY EMF keychain. Whether you enjoy jewelry making or simply want a small weekend craft, making your own keychain can be both enjoyable and practical.
A DIY EMF keychain allows you to combine attractive natural stones, copper accents, and durable hardware into a personalized accessory that travels wherever your keys do. Some people choose these materials because they appreciate their appearance, while others enjoy incorporating stones that are often associated with EMF-conscious lifestyles. It is important to understand that decorative keychains should not be viewed as proven methods for reducing EMF exposure. Instead, they can be a fun way to express your interests while learning basic jewelry-making techniques.
In this guide, you’ll learn how to design, build, and personalize your own DIY EMF keychain, along with practical advice for selecting quality materials, avoiding common mistakes, and creating a finished project you’ll be proud to carry or give as a thoughtful gift.
What Is a DIY EMF Keychain?
Simply put, a DIY EMF keychain is simply a handmade keychain that incorporates materials commonly found in EMF-conscious products. Rather than purchasing a finished accessory, you assemble the components yourself using jewelry-making supplies and natural stones that appeal to you.
Many hobbyists enjoy this type of project because it requires very few specialized tools. Even someone with little crafting experience can complete a simple design in less than an hour. More experienced crafters often create elaborate keychains using decorative wire wrapping, engraved charms, leather cord, or multiple gemstone combinations.
Although the term “EMF keychain” is commonly used online, it’s important to separate appearance from scientific evidence. Stones such as black tourmaline, shungite, and hematite have become popular in wellness communities, but there is currently no strong scientific evidence demonstrating that carrying these stones in a keychain measurably reduces electromagnetic field exposure. If your goal is lowering EMF exposure, practical steps such as increasing distance from wireless devices, limiting unnecessary wireless use, and using protective accessories designed for specific devices generally have stronger supporting evidence.
With that understanding in mind, a DIY EMF keychain can still be an enjoyable craft that reflects your personal interests and creates an attractive accessory for everyday use.
Why Make Your Own Instead of Buying One?
One of the biggest advantages of making your own keychain is that you control every aspect of the finished product. Instead of settling for whatever colors or materials happen to be available, you can build something that matches your own style while choosing components that fit your budget.
There are many reasons people enjoy making these projects, including:
- Complete control over the design and appearance.
- The ability to choose high-quality materials.
- Lower cost than many handmade boutique products.
- A relaxing weekend craft project.
- Thoughtful handmade gifts for family and friends.
- Easy customization for backpacks, purses, luggage, or keys.
- Opportunities to learn basic jewelry-making skills.
Many people also discover that once they purchase a few basic tools, creating additional keychains becomes very inexpensive. Extra beads, wire, and hardware can often be mixed together to create entirely different designs without purchasing many additional supplies.
Materials You’ll Need
Before beginning your project, spend a little time gathering quality supplies. Choosing durable components at the beginning will usually produce a much better finished product that lasts for years instead of months.
Fortunately, most of these items are inexpensive and readily available from craft stores or online retailers.
Basic Hardware
- Split key ring
- Jump rings
- Jewelry pliers
- Round-nose pliers
- Wire cutters
- Leather cord or waxed cord (optional)
- Stainless steel findings
- Lobster clasp (optional)
Decorative Materials
- Black tourmaline beads
- Shungite beads
- Hematite beads
- Lava stone beads
- Wooden spacer beads
- Glass accent beads
- Decorative charms
- Copper jewelry wire
Choosing Natural Stones
Natural stones are often the centerpiece of a DIY keychain because they provide color, texture, and visual interest. Every stone has its own appearance, making each finished project slightly different.
Some of the most popular choices include:
Black Tourmaline
Black tourmaline is one of the most recognizable stones used in wellness jewelry. Its deep black color pairs well with nearly every style and creates a clean, modern appearance. Since every piece is naturally unique, each keychain has its own character.
Shungite
Shungite has become increasingly popular among people interested in EMF-conscious products. Its smooth black finish creates a simple, elegant design that works well alone or combined with metallic accents.
Hematite
Hematite provides a polished metallic appearance that contrasts beautifully with darker stones. Many crafters use it as spacer beads between larger gemstones.
Lava Stone
Lava stone offers a rough, textured finish that gives handmade accessories a more natural look. Some people also enjoy pairing lava stones with essential oils, although this feature is entirely separate from EMF-related discussions.
Wooden Beads
Wooden beads soften the overall appearance of a keychain and work particularly well when creating outdoor or rustic-inspired designs. They also reduce overall weight while adding warmth to the finished project.
Planning Your Design
Before assembling anything, lay all of your materials on a flat table. This simple step allows you to experiment with different color combinations before permanently attaching components together.
Many experienced crafters recommend arranging beads in several different patterns before deciding on a final layout. You may discover that alternating black tourmaline with metallic hematite spacers creates a more balanced appearance than grouping similar beads together.
It also helps to think about where the finished keychain will be used. A minimalist design with only a few beads may fit comfortably in a pocket, while a larger decorative version might work better attached to a backpack or purse. Spending a few extra minutes planning can make the assembly process much smoother and often leads to a finished project that looks more polished.
Step-by-Step Guide to Making Your DIY EMF Keychain
Now that you’ve gathered your materials and planned your design, it’s time to assemble your keychain. Don’t worry if this is your first jewelry-making project. Most of these steps are straightforward, and you’ll likely become more comfortable as you work. The nice thing about making your own keychain is that there isn’t just one “correct” design. Feel free to experiment with different bead combinations, wire patterns, and decorative accents until you’re happy with the finished product.
Step 1: Prepare Your Workspace
Start by working on a flat table with good lighting. A small towel, jewelry mat, or craft mat can help prevent beads from rolling away while protecting your tabletop from scratches.
Keep your pliers, wire cutters, beads, and hardware within easy reach. Organizing everything before you begin helps the project move along more smoothly and reduces the chance of losing small pieces like jump rings.
Step 2: Arrange Your Beads
Before attaching anything permanently, lay your beads out in the order you plan to use them. This is one of the most enjoyable parts of the project because you can experiment with different looks until one stands out.
For example, you might create a pattern like:
- Black tourmaline
- Hematite spacer
- Shungite
- Hematite spacer
- Black tourmaline
Or perhaps you prefer alternating wooden beads with darker stones for a warmer, more natural appearance. There is no right or wrong combination, so don’t be afraid to try several layouts before making your final decision.
Step 3: String the Components
Once you’ve settled on a design, begin threading your beads onto your chosen material. Depending on your project, this could be jewelry wire, waxed cord, leather cord, or another durable stringing material.
If you’re using jewelry wire, leave a little extra length on each end. This extra wire makes it much easier to create secure loops later without running short.
As you add each bead, double-check that the arrangement still looks balanced. Occasionally stepping back for a quick look can help you catch spacing issues before everything is secured.
Step 4: Secure the Ends
After all of your beads are in place, it’s time to secure both ends of the design.
If you’re using jewelry wire, create a small loop at one end using round-nose pliers. Twist the remaining wire around itself several times before trimming the excess with wire cutters. Repeat the process on the opposite end.
If you’re using cord instead of wire, tie strong knots and consider adding a small amount of jewelry adhesive designed for crafts to help reduce the chance of the knot loosening over time.
Take your time during this step. Strong connections are one of the biggest differences between a keychain that lasts for years and one that falls apart after a few weeks.
Step 5: Add Decorative Touches
This is where your creativity can really shine.
Some people like adding small charms that represent hobbies, favorite animals, initials, or inspirational symbols. Others prefer a clean, minimalist look with only natural stones.
You could also incorporate:
- Copper wire spirals
- Small tassels
- Metal spacers
- Decorative bead caps
- Colored accent beads
- Engraved initials
- Mini compass charms
- Nature-themed pendants
Adding just one or two decorative pieces often creates a more refined appearance than overcrowding the design with too many accessories.
Step 6: Attach the Key Ring
Using a jump ring and pliers, attach your finished design to the split key ring.
Open the jump ring by twisting it sideways rather than pulling it apart. This helps maintain its circular shape and makes it easier to close securely afterward.
Once everything is attached, gently tug on each connection to ensure it is properly closed.
Step 7: Inspect Your Finished Project
Before putting your new keychain into everyday use, inspect each connection carefully.
Look for:
- Loose wire
- Open jump rings
- Weak knots
- Cracked beads
- Sharp wire ends
- Uneven spacing
Making small adjustments now can greatly improve the durability and appearance of your finished project.
Affiliate Advertisement
Creative DIY EMF Keychain Ideas
One of the biggest advantages of making your own accessories is the nearly endless number of design possibilities. Even using the same supplies, two people can create completely different-looking keychains. As your confidence grows, you may find yourself creating seasonal designs, themed gifts, or matching sets for family members and friends.
Here are several ideas that can inspire your next project.
Minimalist Everyday Keychain
Sometimes simplicity creates the most elegant result.
A single black tourmaline bead paired with two polished hematite spacers and a stainless steel key ring creates a clean design that looks professional without attracting unnecessary attention.
Outdoor Adventure Keychain
Combine wooden beads, lava stones, leather cord, and a small mountain charm to create a rugged accessory that’s perfect for hiking backpacks, camping gear, or travel bags.
Copper Spiral Design
Wrap polished copper wire around a larger center stone to create an eye-catching focal point. This style requires a little extra patience but gives the finished piece a handcrafted appearance.
Matching Family Sets
Consider making similar keychains for family members while varying the accent colors or charms so each one remains unique. Handmade gifts often become meaningful keepsakes because they were created with care rather than purchased from a store.
Purse or Backpack Charm
Your finished design doesn’t have to stay on a key ring. Many people attach handmade creations to handbags, backpacks, lunch bags, or zipper pulls as decorative accessories.
Tips for Choosing Quality Materials
The appearance and durability of your finished keychain depend largely on the quality of the materials you choose. While inexpensive supplies can certainly work for practice projects, investing a little more in good-quality components often produces noticeably better results.
When shopping for materials, keep the following suggestions in mind.
- Choose natural stones from reputable sellers whenever possible.
- Look for smooth drill holes that won’t damage cord or wire.
- Select stainless steel hardware to help resist rust.
- Avoid lightweight jump rings that bend easily.
- Choose thicker jewelry wire if creating heavier designs.
- Inspect beads for cracks before using them.
- Purchase a few extra beads in case one becomes damaged during assembly.
Good-quality supplies may cost slightly more initially, but they usually produce projects that last much longer with regular everyday use.
Common Mistakes to Avoid
Like most craft projects, making a keychain becomes easier with practice. Even experienced jewelry makers occasionally discover that a certain bead arrangement doesn’t look quite right or that a connection needs to be redone. Fortunately, most mistakes are simple to correct, especially if you notice them before your keychain is finished.
Here are several common issues that beginners often encounter and how you can avoid them.
Using Weak Hardware
One of the quickest ways for a handmade keychain to fail is by using inexpensive split rings or thin jump rings that bend easily. Since your keys are handled multiple times each day, every connection experiences repeated stress.
Choosing durable stainless steel hardware is often worth the small additional cost because it helps the keychain withstand years of regular use.
Overloading the Design
It can be tempting to include every bead and charm you own, but heavier isn’t always better.
A keychain that is too large can become uncomfortable in a pocket, place unnecessary strain on wire connections, and make everyday use less convenient. A simple design with carefully selected materials often looks more elegant than one overloaded with decorations.
Ignoring Balance
Even beautiful materials can appear awkward if they aren’t arranged thoughtfully.
Before securing everything permanently, lay your design flat and look at it from several angles. Consider whether one side appears noticeably heavier or whether the colors feel evenly distributed throughout the design.
Taking a few extra minutes during the planning stage can make a surprising difference in the finished appearance.
Skipping Final Testing
Once your keychain is assembled, gently pull on each connection before using it.
Check that:
- Jump rings are fully closed.
- Wire loops don’t move.
- Knots remain tight.
- Beads stay securely in place.
- Sharp wire ends have been trimmed.
This quick inspection may only take a minute, but it can prevent your handmade project from coming apart unexpectedly.
Can a DIY EMF Keychain Reduce EMF Exposure?
Because the phrase “EMF keychain” appears frequently online, it’s worth discussing what these accessories can and cannot do.
Many people choose stones such as black tourmaline, shungite, and hematite because these materials have become popular within wellness communities. Others simply appreciate their appearance and enjoy creating accessories using natural gemstones. While you’ll find many personal stories describing positive experiences, these accounts should not be considered scientific proof.
At this time, there is no widely accepted scientific evidence showing that carrying a gemstone keychain measurably reduces your exposure to electromagnetic fields from phones, Wi-Fi routers, laptops, or other electronic devices.
If your primary goal is reducing EMF exposure, practical habits generally have much stronger support. These include keeping wireless devices a greater distance from your body when possible, using speakerphone or wired accessories during longer phone calls, turning off wireless features when they are not needed, and avoiding unnecessary prolonged exposure to transmitting devices.
Many people enjoy making these keychains because they appreciate the creative process and the attractive finished product rather than expecting measurable changes in EMF exposure. Looking at the project from that perspective helps set realistic expectations while still allowing you to create something meaningful and enjoyable.
Other Ways to Build an EMF-Conscious Lifestyle
A handmade keychain can be a fun project, but many readers are also interested in practical ways to create an overall EMF-conscious lifestyle. Small everyday habits often have a greater impact than any single accessory, and many of these changes are simple to incorporate into your routine.
Some ideas include:
- Keep your phone in a bag or on a desk instead of a pocket whenever practical.
- Use speakerphone during longer conversations when privacy allows.
- Turn on Airplane Mode when wireless connectivity isn’t needed.
- Avoid sleeping with your phone directly beside your pillow.
- Place Wi-Fi routers in areas where your family spends less time.
- Learn how to measure your environment with an EMF meter if you’re curious about the devices in your home.
If you’re interested in measuring your surroundings rather than guessing, an EMF meter can provide objective readings from many common household electronics. Learning how different devices behave can help you make informed decisions based on actual measurements instead of assumptions.
Caring for Your Handmade Keychain
One advantage of creating your own keychain is that maintenance is usually very simple. Spending just a few minutes every couple of months can keep it looking attractive for years.
Begin by wiping the beads with a soft microfiber cloth to remove fingerprints, dust, and everyday grime. If needed, lightly dampen the cloth with water, but avoid soaking natural stones unless you know they tolerate moisture well.
Inspect the wire and jump rings occasionally for signs of wear. If something begins to loosen, repairing it immediately is much easier than rebuilding the entire project after it comes apart.
Store extra keychains in a small jewelry pouch or storage container to prevent scratches and tangles. If you create multiple designs for gifts or different seasons, labeling small storage bags can also make them easier to organize.
With proper care, a handmade keychain can remain an attractive everyday accessory for many years.
Final Thoughts
Creating a DIY EMF keychain is an enjoyable project that combines creativity, craftsmanship, and personalization into something you can use every day. Whether you choose black tourmaline, shungite, hematite, wood, copper accents, or another combination of materials, the finished result reflects your own style and interests in a way that store-bought accessories often cannot.
While natural stones have become popular among people interested in EMF-conscious living, it’s important to remember that a handmade keychain should be viewed primarily as a decorative accessory rather than a scientifically proven method of reducing electromagnetic field exposure. Pairing your craft projects with practical habits, such as maintaining reasonable distance from wireless devices and understanding your everyday environment, provides a balanced approach.
Perhaps the best part of making your own keychain is that no two projects are exactly alike. As your skills improve, you can experiment with new materials, different color combinations, decorative wire wrapping, and custom charms to create gifts for family members or unique accessories for yourself. Each new project becomes an opportunity to learn another technique while enjoying the satisfaction of creating something by hand.
If this is your first jewelry-making project, don’t worry about making it perfect. Start with a simple design, take your time, and enjoy the process. Before long, you may find yourself creating an entire collection of handmade accessories that are both attractive and uniquely your own.
Before You Go…
Get Weekly EMF Protection Tips
Enjoy this article? Join the EMFLuLu newsletter for simple weekly tips to reduce everyday EMF exposure from phones, WiFi routers, laptops, and smart home devices.
Try Our Free EMF Calculators
Curious how much EMF exposure you may experience each day?
These simple tools can help you estimate your exposure and identify possible problem areas in your home.
Try these free calculators:
Like this article? Pin it on Pinterest!

More to Explore