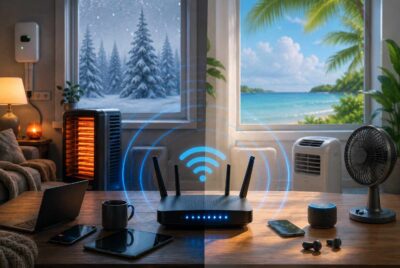
As more people work from home, our offices have become command centers for technology – laptops, routers, smartphones, Bluetooth headsets, smart lighting, and even standing desks with electric motors. All these devices emit electromagnetic fields (EMF), and while we can’t see or feel them, some people experience discomfort or simply want to reduce long-term exposure.
That’s where DefenderShield’s EMF Shielding By the Foot comes in – a flexible, high-performance shielding fabric designed to block up to 99% of wireless RF (0-10 GHz) and 98% of ELF radiation. Sold by the yard, it gives you freedom to cut, sew, or mount it wherever you need protection.
In this article, we’ll explore how to install EMF shielding fabric by the yard in home office step-by-step. You’ll learn what this material is, how it works, the best ways to mount it on walls or furniture, and how to test its effectiveness after installation. Whether you’re building a full EMF-shielded workspace or just protecting the area behind your desk, this guide covers everything you need to know.
What EMF Shielding Fabric by the Foot Is and How It Works
Before jumping into installation, it’s essential to understand what EMF shielding fabric actually does.
DefenderShield’s EMF Shielding By the Foot is a fabric engineered with multiple layers of conductive materials. It reflects and absorbs electromagnetic radiation – including radiofrequency (RF) waves from WiFi routers and cell towers, and extremely low frequency (ELF) emissions from wiring and electrical devices.
When EMF waves hit this conductive layer, the electric component of the wave induces currents that either dissipate or reflect energy, preventing it from passing through. In simpler terms: it acts like an invisible barrier between you and the electronic chaos around you.
Perfect for DIY projects – you can use it for:
- Lining a wall behind your workstation
- Creating curtains to shield windows
- Sewing it into clothing or laptop bags
- Wrapping routers, smart hubs, or other sources of radiation
Because you can cut and shape it, it’s far more versatile than pre-made shielding panels or paints.
Why Use EMF Shielding Fabric in a Home Office?
The home office might be one of the highest EMF exposure zones in your entire house. It’s often packed with:
- A WiFi router or mesh network node
- A laptop, monitor, and docking station
- Wireless printers, phones, and speakers
- Bluetooth peripherals and chargers
Each device emits low-level radiation that accumulates in your workspace, especially if your desk sits near the router or electrical panel. While exposure levels are typically within regulatory limits, many people prefer to reduce them as a precautionary measure – particularly those who experience Electromagnetic Hypersensitivity (EHS) symptoms like fatigue, headaches, or difficulty concentrating.
Installing EMF shielding fabric by the yard in your home office provides a targeted, flexible way to reduce ambient EMF where you spend most of your day. You don’t need to shield the entire room – even a single protected wall can reduce exposure from nearby routers or smart meters outside.
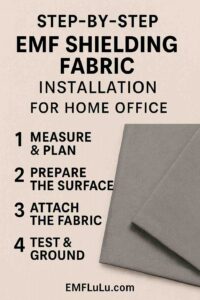
Step-by-Step: How to Install EMF Shielding Fabric by the Yard in Home Office
If you’re ready to start, follow these five detailed steps. You don’t need to be a professional – just a bit of patience, a measuring tape, and some DIY spirit.
Step 1: Measure Your Space and Plan the Layout
Before cutting anything, take time to plan. Precise measurements save money and ensure a cleaner installation.
Here’s how to do it:
- Decide what to shield.
The most effective approach is to cover the wall directly behind your desk, since that’s where your body spends the most time. If your router or smart meter is behind that wall, shielding there will yield maximum benefit. - Measure dimensions carefully.
Use a tape measure to determine the height and width of the area. - Map out seams and overlaps.
Because EMF can “leak” through tiny gaps, plan to overlap each piece by at least one inch. Mark positions lightly on the wall with pencil or masking tape. - Gather your materials.
You’ll need scissors, double-sided adhesive or staples, conductive foil tape, gloves, and (if grounding) a grounding kit or wire with ring terminal.
Step 2: Prepare the Wall or Surface
Preparation ensures your installation lasts and works efficiently.
- Clear the wall area. Remove pictures, nails, or shelving. If possible, detach baseboards or trim so fabric can fit edge-to-edge.
- Clean the surface. Wipe down dust or grease. Adhesive and tape stick far better on a clean surface.
- Check for electrical outlets. Turn off power to outlets in that wall before working. If you’re shielding around outlets, cut small slits and reseal around them later with conductive tape to maintain continuity.
- Decide on mounting method. If the wall is unfinished, staple fabric to studs before drywalling. For existing walls, use double-sided adhesive or spray glue that won’t damage paint.
Step 3: Attach the Shielding Fabric
Now for the main installation step – where your room begins to transform.
To attach EMF shielding fabric by the yard in your home office:
- Lay out your first piece. Start from one corner at the top of the wall. Align the fabric so it’s straight and taut.
- Secure the top edge. Use staples or strong double-sided tape across the top line. Press firmly to remove wrinkles.
- Smooth downward. Slowly work your way down the wall, pressing or stapling every 4–6 inches. Wrinkles or air pockets can cause uneven contact.
- Overlap seams. When adding the next piece, overlap at least one inch and secure both layers together using conductive foil tape. This maintains electrical continuity between panels — essential for effective EMF blocking.
- Wrap corners and edges. EMF can slip through corners, so extend fabric slightly around them or add conductive tape.
- Check alignment frequently. Step back to ensure even coverage before finalizing all sections.
If you’re using the fabric to create curtains or panels instead of wall installations:
- Sew the edges using conductive thread (available from EMF supply stores).
- Insert grommets or hooks for easy hanging.
- Ensure overlapping edges where panels meet.
Step 4: Ground the Fabric (Optional but Recommended)
While DefenderShield’s EMF Shielding Fabric reflects most radiation passively, grounding enhances its performance, especially for ELF fields (from wiring).
How to ground it safely:
- Purchase a grounding kit with conductive clips and a wire that connects to a standard grounded outlet.
- Attach the grounding clip securely to the foil tape or corner of the fabric.
- Plug the wire into the grounding port of your wall outlet (the round hole).
- Verify continuity with a multimeter – you should see a connection between the fabric and ground.
If you’re uncertain about grounding, consult an electrician. Grounding mistakes can reduce effectiveness or cause electrical feedback. Still, even ungrounded, the fabric provides significant RF shielding.
Step 5: Test and Fine-Tune
After installation, the real proof comes from testing.
To confirm your setup works:
- Use an EMF or RF meter. Measure field strength in key areas before and after installation. You should see noticeable drops in readings, especially near the shielded wall.
- Check for leaks. Move the meter along seams, outlets, and window edges. If readings spike, add foil tape or adjust fabric overlap.
- Monitor temperature and ventilation. If you shield routers or electronics directly, ensure they don’t overheat. Leave at least 2–3 inches of breathing space.
Testing validates that your EMF shielding fabric by the yard is performing as expected and shows you exactly where to make improvements.
Affiliate Advertisement

Evaluating Effectiveness, Cost, and Limitations
Effectiveness
According to DefenderShield, the fabric blocks up to 99% of wireless RF and 98% of ELF radiation (0-10 GHz). In real-world conditions, expect strong reduction but not complete elimination – especially if your room has gaps, open windows, or exposed wiring.
The key is to treat shielding as one part of an EMF-reduction strategy, along with:
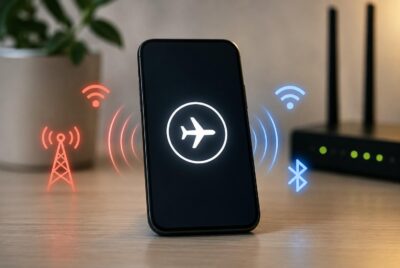
- Increasing distance between you and devices
- Turning off WiFi at night
- Using wired Ethernet connections
- Keeping phones on airplane mode when not in use
Together, these steps significantly lower cumulative exposure.
Cost
The DefenderShield EMF Shielding By the Foot currently retails between $34.99 per unit. If you plan to cover a full 8-foot wall, you might need 6–8 units. Though not cheap, it’s comparable to premium shielding paints or professional installation.
Remember, the By the Yard product is not covered by DefenderShield’s return policy or one-year limited warranty, so measure carefully and plan ahead.
Limitations
- Fabric cannot block EMF completely; it reduces it.
- Openings (windows, vents, doors) allow leakage.
- Improper grounding reduces performance.
- Installation mistakes (gaps, loose seams) cause signal bleed.
Despite these limitations, when installed properly, this material is one of the most flexible and high-performance options for DIY home shielding.
Affiliate Advertisement

Who Should Use EMF Shielding Fabric by the Yard?
This product is ideal for people who:
- Spend 6+ hours a day working near WiFi routers, Bluetooth devices, or electrical panels.
- Experience symptoms of EMF sensitivity such as fatigue, insomnia, or headaches.
- Live near cell towers, smart meters, or dense WiFi environments.
- Want a DIY EMF protection project without full professional installation.
- Need flexibility – for example, cutting pieces to line a desk, wrap electronics, or sew into curtains.
However, if your home office already uses wired internet and minimal wireless devices, you may not need extensive shielding. Start by measuring EMF levels before investing heavily.
Maintenance and Long-Term Care
Once installed, your EMF shielding wall or curtain needs minimal maintenance:
- Keep dry. Moisture can degrade conductive materials over time.
- Avoid painting directly on the fabric. Instead, cover with thin fabric or removable wallpaper.
- Inspect seams annually. Re-tape any loose edges.
- Re-test every six months. As you add new devices or routers, readings may change.
A little upkeep ensures your investment continues to perform at peak levels.
Conclusion
Learning how to install EMF shielding fabric by the yard in home office empowers you to take control of your environment. With DefenderShield’s flexible material, you can customize protection exactly where you need it – whether that’s behind your desk, near your router, or surrounding your workspace walls.
While it doesn’t replace common-sense steps like turning off WiFi when not in use or keeping distance from devices, EMF shielding fabric offers a practical, durable way to reduce daily exposure and work with greater peace of mind.
Before You Go…
Get Weekly EMF Protection Tips
Enjoy this article? Join the EMFLuLu newsletter for simple weekly tips to reduce everyday EMF exposure from phones, WiFi routers, laptops, and smart home devices.
Try Our Free EMF Calculators
Curious how much EMF exposure you may experience each day?
These simple tools can help you estimate your exposure and identify possible problem areas in your home.
Try these free calculators:
Like this article? Pin it on Pinterest!
More to Explore