As interest in EMF awareness continues to grow, many people are looking for practical ways to explore products and accessories associated with electromagnetic field exposure. One trend that has gained popularity is creating handmade EMF-related jewelry. A DIY EMF protection bracelet can be an enjoyable project for anyone who likes crafting, jewelry making, or personal wellness accessories. Building your own bracelet allows you to choose the materials, customize the appearance, and create something that reflects your personal style.
Many commercially available EMF bracelets can be expensive, and not everyone wants to purchase a pre-made product. By learning how to make your own bracelet, you can experiment with different beads, stones, and metals while gaining a better understanding of the materials commonly used in EMF-related jewelry. In this guide, we’ll walk through the entire process, from selecting materials to assembling and maintaining your bracelet.
What Is an EMF Protection Bracelet?
Before beginning any jewelry-making project, it helps to understand why these bracelets have become popular. EMF bracelets are typically pieces of jewelry that incorporate materials such as shungite, black tourmaline, hematite, copper, or other minerals that are frequently associated with EMF awareness communities.
People choose to wear these bracelets for many different reasons. Some enjoy the appearance of natural stone jewelry, while others appreciate the symbolism associated with various minerals. Others simply like incorporating EMF-conscious accessories into their daily routines.
It’s important to recognize that opinions vary regarding the effectiveness of wearable EMF products. Individuals interested in EMF reduction often combine jewelry with broader lifestyle habits such as increasing distance from wireless devices, limiting unnecessary exposure, and using shielding accessories when appropriate.
Popular Materials Used in EMF Jewelry
The materials you select will largely determine the appearance and character of your finished bracelet. Fortunately, most supplies are easy to find online or at local craft stores.
Many jewelry makers gravitate toward a handful of popular materials that are commonly featured in EMF-related accessories.
Shungite
Shungite is perhaps the most frequently discussed stone in EMF jewelry circles. This black mineral originates primarily from Russia and has become widely available in bead form. Its dark appearance makes it easy to combine with many other materials, and it works well in both men’s and women’s bracelet designs.
Black Tourmaline
Black tourmaline is another favorite among jewelry makers. Its deep black color creates a sophisticated appearance while pairing nicely with metallic spacer beads and natural stones. Many people choose black tourmaline because it offers a rugged, natural look.
Hematite
Hematite provides a polished metallic appearance that adds visual contrast to darker stones. Hematite beads can create a more modern design while helping break up repetitive bead patterns.
Copper
Copper has been used in jewelry making for centuries. Copper spacers, rings, and decorative elements can introduce warmth and visual interest into your bracelet design.
Stainless Steel Spacers
If you prefer a cleaner and more contemporary appearance, stainless steel spacer beads can add structure without overwhelming the design.
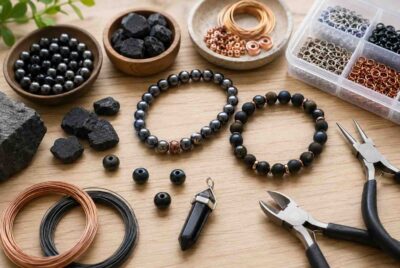
Tools Needed for the Project
One of the advantages of making your own jewelry is that very few tools are required. Most beginners can complete this project with inexpensive supplies.
Gathering your materials before beginning will make the process smoother and help prevent mistakes during assembly.
You will typically need:
- Stretch jewelry cord
- Scissors
- Measuring tape
- Bead tray or shallow container
- Jewelry adhesive
- Selected beads and spacer materials
Step 1: Measure Your Wrist
Accurate measurements are one of the most important parts of creating a comfortable bracelet. A bracelet that is too tight may become uncomfortable during daily wear, while one that is too loose may catch on clothing or other objects.
Use a flexible measuring tape and wrap it around your wrist where you would normally wear the bracelet. Record the measurement and add approximately one-half inch to one inch depending on your preferred fit.
Most adult bracelet sizes fall between six and eight inches, although individual preferences vary considerably.
Taking a few extra moments to measure correctly can prevent frustration later in the project.
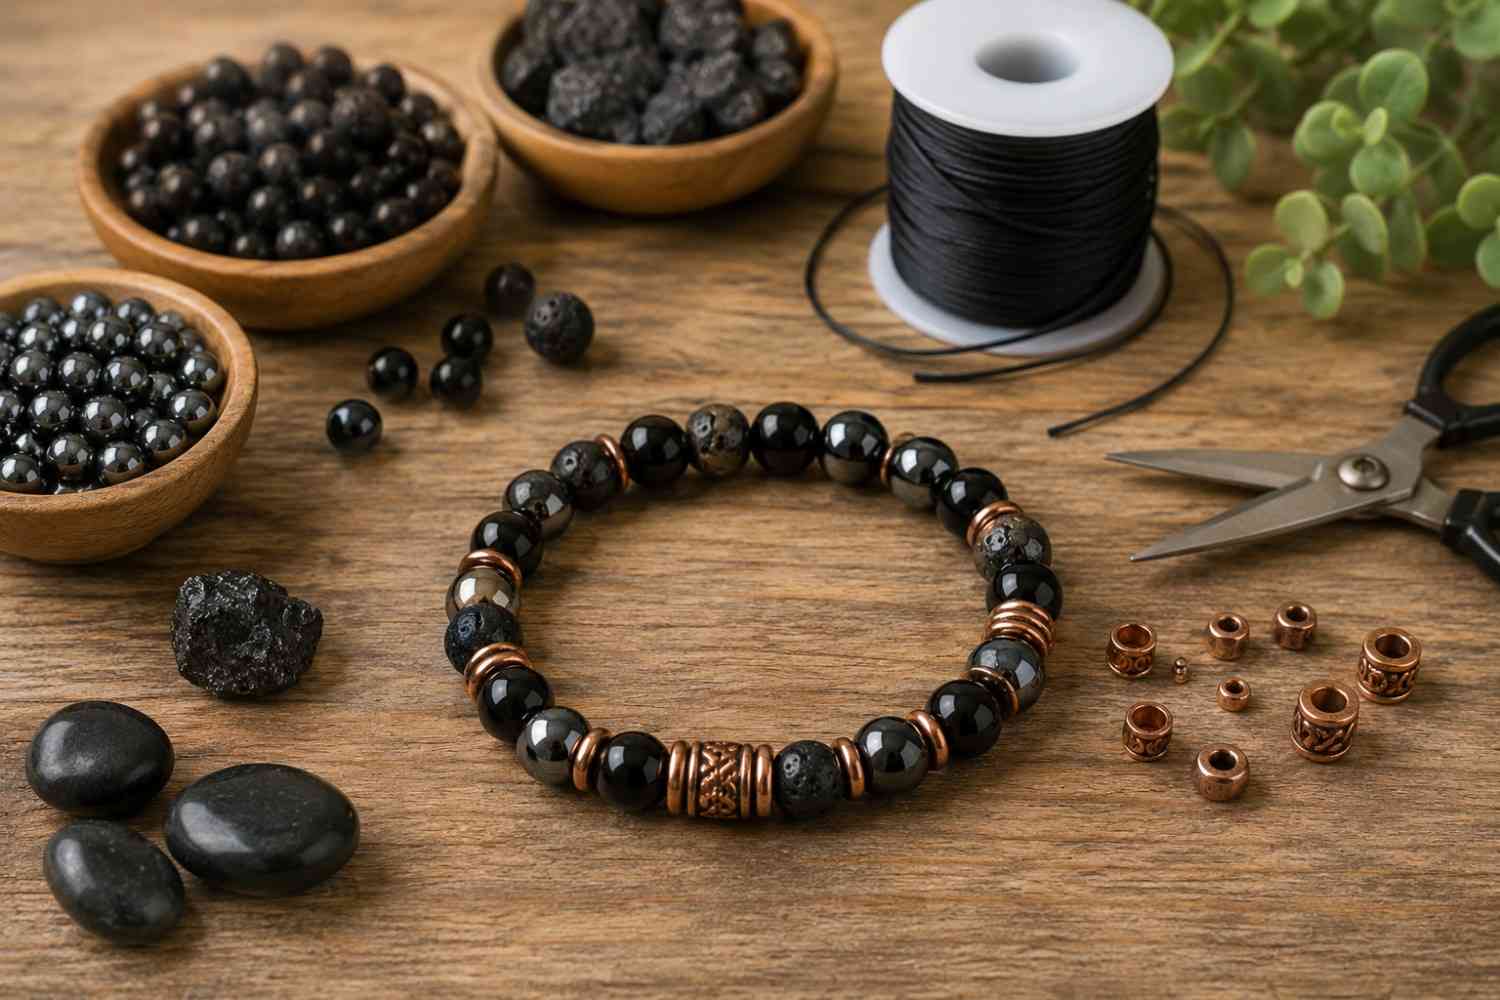
Step 2: Plan Your Design
Before stringing any beads, arrange them on a table or bead tray. This allows you to visualize the final bracelet and make adjustments before assembly begins.
Some people prefer symmetrical designs that repeat the same pattern around the entire bracelet. Others enjoy more natural arrangements with varying bead sizes and materials.
For example, a simple design might alternate black tourmaline and hematite beads throughout the bracelet. Another design could feature shungite beads with copper spacers placed every third bead.
Planning the layout in advance often leads to a more polished finished product.
Step 3: String the Beads
Once you’re satisfied with the design, cut a piece of stretch cord several inches longer than your target bracelet length. The extra cord will make it easier to handle during assembly and knot tying.
Begin threading the beads according to your planned pattern. Take your time and periodically check the arrangement to ensure everything remains consistent.
This stage is where a DIY EMF protection bracelet truly begins to take shape. Watching the individual components come together can be one of the most rewarding parts of the project.
As you add beads, gently stretch the cord occasionally to verify that it remains flexible and untangled.
Step 4: Secure the Bracelet
After all beads have been added, carefully bring both ends of the cord together. Test the fit before tying a permanent knot.
Many jewelry makers use a surgeon’s knot or a double overhand knot for added security. After tying the knot, apply a small drop of jewelry adhesive to help reduce the likelihood of the knot loosening over time.
Allow the adhesive to dry completely before trimming excess cord.
A secure knot is critical because it often determines how long the bracelet will last during daily use.
Step 5: Test the Fit
After the adhesive has dried, place the bracelet on your wrist and evaluate the fit. The bracelet should feel comfortable without being overly tight or excessively loose.
Move your wrist through normal motions and observe how the bracelet sits. If necessary, make adjustments before wearing it regularly.
This final evaluation ensures your finished piece is both functional and comfortable.
Creative Bracelet Design Ideas
One of the most enjoyable aspects of jewelry making is the opportunity to experiment with different styles. The same basic materials can be used to create dramatically different looks.
A minimalist bracelet might consist entirely of black tourmaline beads with a single metallic accent bead. This style works well for those who prefer understated jewelry.
An outdoor-inspired bracelet could combine shungite, wood beads, and copper spacers to create a more rugged appearance.
A professional office design may incorporate hematite and stainless steel spacers for a clean, modern look that complements business attire.
Some people even create matching bracelet sets featuring different combinations of stones and metals, allowing them to switch styles depending on the occasion.
Benefits of Making Your Own Bracelet
There are several reasons why DIY jewelry projects continue to attract enthusiasts year after year.
First, making your own bracelet can be significantly less expensive than purchasing a pre-made product. Individual materials often cost less than finished jewelry pieces.
Second, customization is virtually unlimited. You can select every component, choose the exact size, and create a design that reflects your personal preferences.
Third, jewelry making can be a relaxing and enjoyable hobby. Many people find the process itself rewarding, even before the bracelet is completed.
Finally, learning how to create a DIY EMF protection bracelet gives you the ability to repair or redesign it in the future rather than replacing it entirely.
Additional Ways to Reduce Everyday EMF Exposure
While jewelry may be one component of an EMF-conscious lifestyle, many people focus on practical habits that can reduce unnecessary exposure throughout the day.
Creating distance between yourself and wireless devices is often one of the simplest strategies. Using speakerphone functions, texting instead of making long calls, and avoiding carrying phones directly against the body are common recommendations.
Some individuals also choose to limit wireless device use during sleeping hours by turning off unnecessary electronics or placing devices farther from the bed.
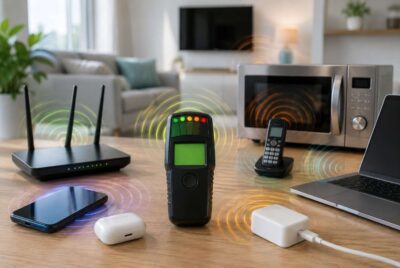
For those interested in additional EMF-related products, there are several tools available that may complement a broader EMF awareness strategy.
DefenderShield EMF Radiation Protection
EMF Harmony EMF Protection Products
Safe Living Technologies EMF Meters
An EMF meter can be particularly useful because it allows individuals to measure and better understand the electromagnetic fields present in their homes and workplaces.
Affiliate Advertisement

Common Mistakes Beginners Make
Nearly every beginner encounters a few challenges during their first jewelry project. Fortunately, most mistakes are easy to avoid.
One common issue is selecting stretch cord that is too thin for the weight of the beads. Thin cord may wear out more quickly and increase the risk of breakage.
Another mistake involves inaccurate sizing. Failing to measure the wrist correctly can result in a bracelet that is uncomfortable to wear.
Many beginners also attempt overly complex designs during their first project. Starting with a simple layout often leads to better results and greater confidence.
Finally, rushing through the knotting and adhesive process can shorten the life of the bracelet. Taking extra care during the final assembly stage usually pays off in durability.
Frequently Asked Questions
Do DIY EMF bracelets really work?
Opinions vary considerably regarding wearable EMF products. Many people enjoy these bracelets as part of a broader EMF-conscious lifestyle, while others appreciate them primarily as attractive handmade accessories. Readers should conduct their own research and make informed decisions based on their personal goals.
Which stones are most commonly used?
Shungite, black tourmaline, and hematite are among the most frequently used materials in EMF-related jewelry projects.
How much does it cost to make one?
Most DIY bracelets can be made for approximately $10 to $40 depending on bead quality, materials, and design complexity.
Conclusion
Creating your own jewelry can be both enjoyable and rewarding, especially when you have complete control over the materials and design. Whether you prefer black tourmaline, shungite, hematite, copper, or a combination of several materials, the process is straightforward enough for most beginners to complete in an afternoon. A DIY EMF protection bracelet offers an opportunity to learn basic jewelry-making skills while creating a personalized accessory that reflects your own interests and style. With a little creativity and patience, you can design a bracelet that is both attractive and uniquely your own.
Before You Go…
Get Weekly EMF Protection Tips
Enjoy this article? Join the EMFLuLu newsletter for simple weekly tips to reduce everyday EMF exposure from phones, WiFi routers, laptops, and smart home devices.
Try Our Free EMF Calculators
Curious how much EMF exposure you may experience each day?
These simple tools can help you estimate your exposure and identify possible problem areas in your home.
Try these free calculators:
Like this article? Pin it on Pinterest!
More to Explore